

You are responsible for your own Stripe account and for creating the products and prices you want to sell (one product per paid training).
Setting up the integration
The Stripe settings are available in the backoffice under Development → Stripe settings → Settings.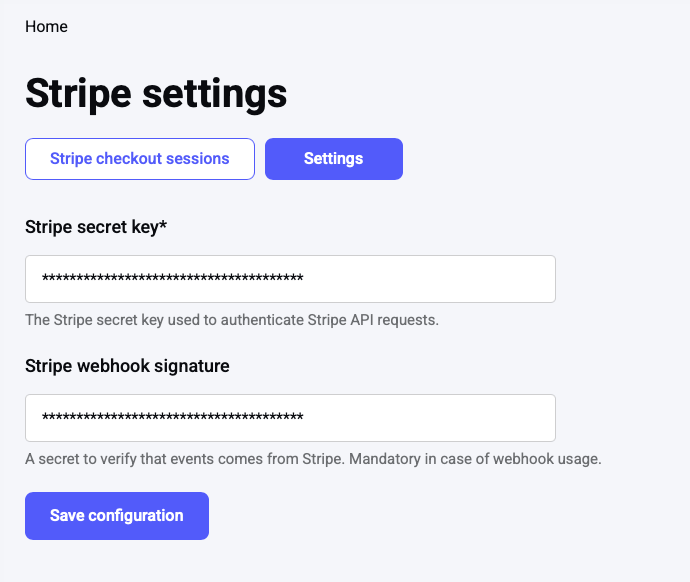
sk_test_) while validating the setup, and your live key (starts with sk_live_) in production.
Stripe webhook signature: The signing secret (starts with whsec_) used to verify that incoming events genuinely come from Stripe. It is mandatory as soon as the webhook is used — every event is checked against this secret and any request with a missing or invalid signature is rejected.
Click Save configuration to apply the settings.
Making a training payable
A training becomes payable by adding a Stripe product reference to it. On the training’s passing requirements, enable the commerce option and enter the Stripe identifier of the product you want to sell. As soon as this reference is set, the training is treated as paid: its Enroll / Login and enroll buttons become Purchase / Login and purchase in the learner area. If you remove the reference, the training reverts to standard enrollment.Following payments: Stripe checkout sessions
Every checkout initiated from the learner area is recorded in Development → Stripe settings → Stripe checkout sessions. This log lets you follow and audit each payment.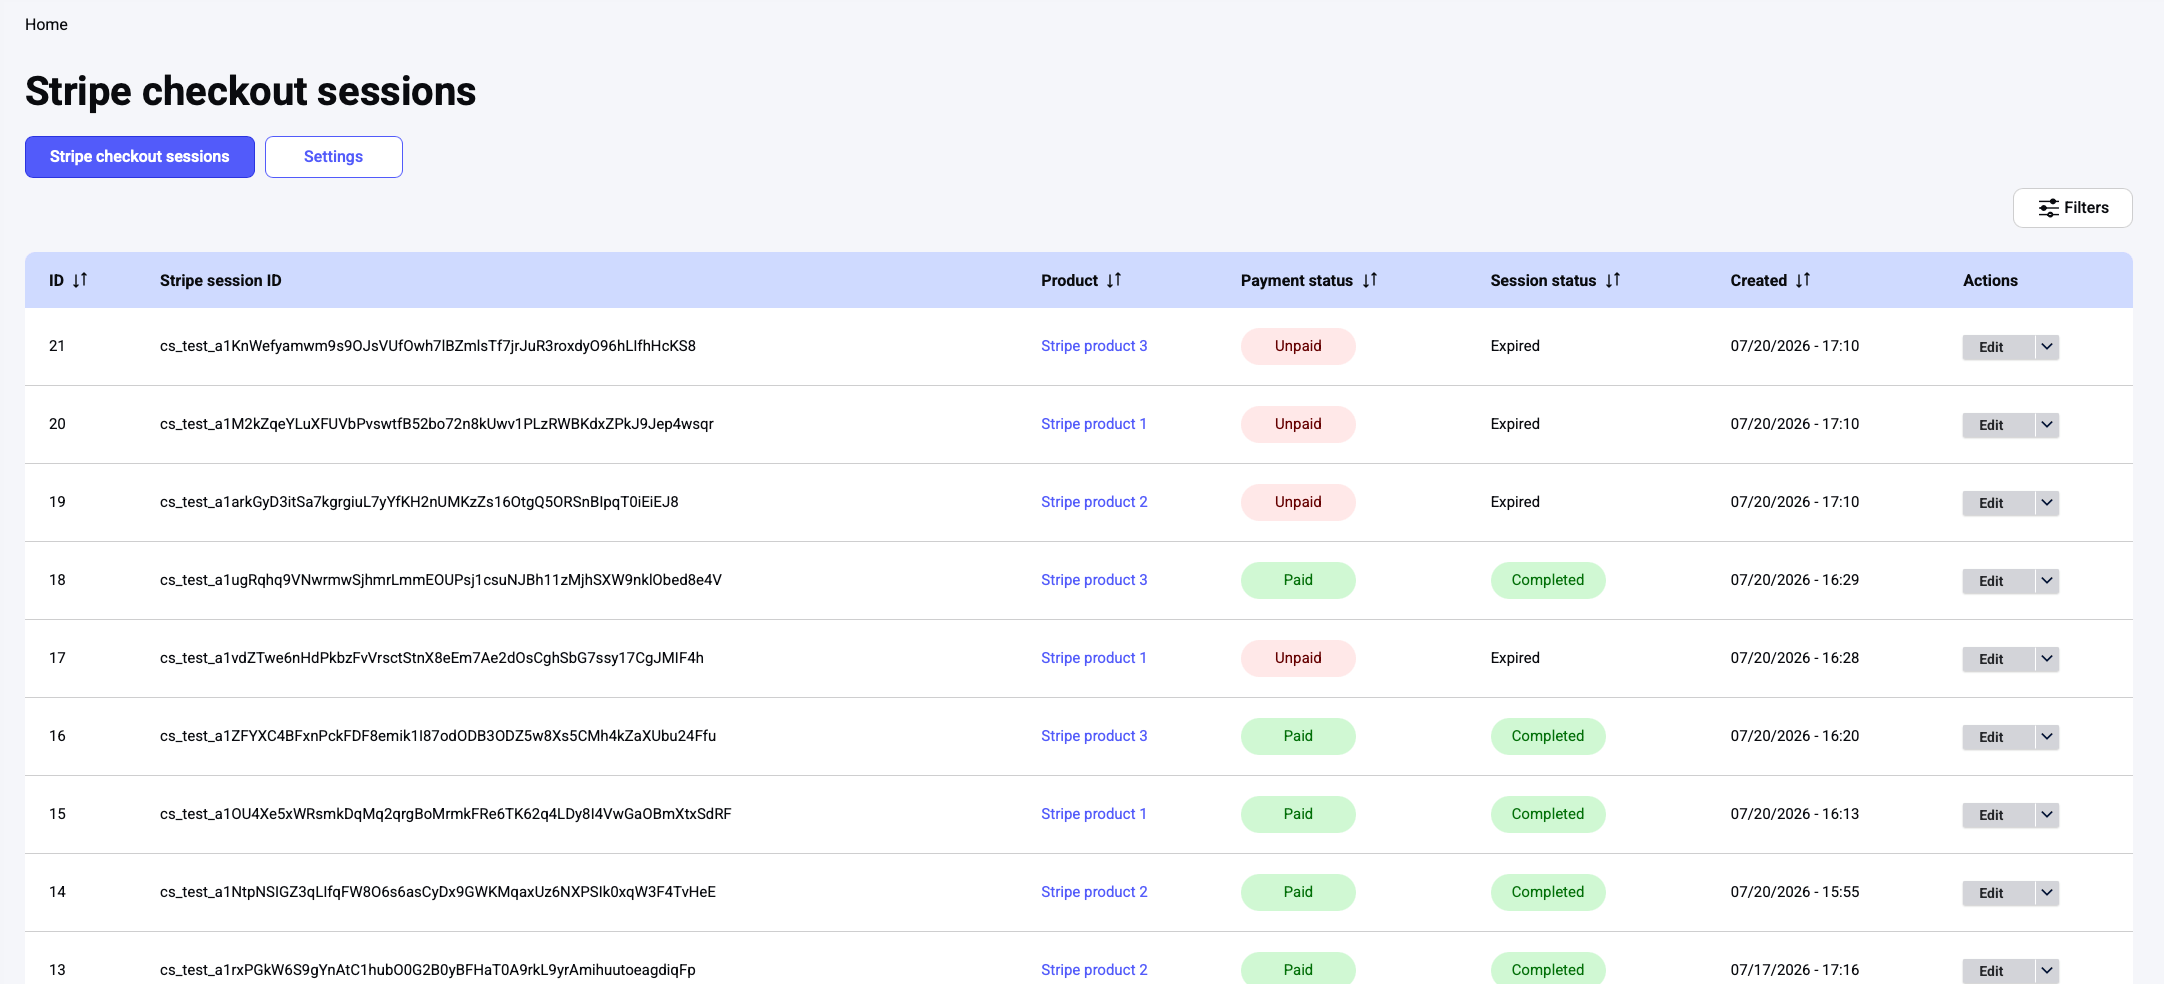
cs_), useful for cross-referencing in your Stripe dashboard.
Product: The Stripe product the learner is purchasing.
Payment status: Whether Stripe has received the payment — Paid or Unpaid.
Session status: The lifecycle of the checkout session — Pending (checkout created, payment not completed yet), Completed (payment confirmed and access granted), or Expired (the checkout session lapsed before payment).
Created: The date and time the session was created.
Actions: The Edit button to open the session details.
You can sort the table by clicking a column header, and narrow the list with the Filter button.
What the learner sees
For a payable training, the learner journey is:1
Purchase
The learner opens the training in the catalog and clicks Purchase (or Login and purchase if they are not signed in yet).
2
Checkout on Stripe
Opigno prepares the checkout and redirects the learner to Stripe’s secure, hosted payment page, where they complete the payment.
3
Confirmation
After a successful payment, Stripe redirects the learner back to a confirmation page that links to the training homepage.
4
Access granted
Once Stripe confirms the payment, the learner is automatically enrolled and can start the training.
Enrollment is granted only after Stripe confirms the payment, so access remains reliable even if the learner closes the browser during checkout. Instant methods such as cards grant access immediately; delayed methods (for example bank transfer or SEPA) grant access once the payment settles.